Thursday 23 March 2017

Suspension Renovation

Finally I've got around to removing the rear shocks so I can tidy them up. They were looking pretty sorry as is to be expected (the rest of the bike was so why not these too).


The shock was dismantled using a ratchet strap since I don't have a spring compressor. It worked but was a bit of a hassle. the top cups were mis-shapen and dented so I used an old large socket wrench as an anvil to reshape the cap.


As you can see, pretty beaten up. I hammered them into shape and fixed a split in the top of one of them. 


Colour choice was dictated by the colour of the bike, so black and red were in there but as an extra bit of flair I did the spring in white to contrast with the main black colour. The damper is now black and the cap is red. I think they turned out really well and they're a huge improvement over the original rusted patina.


Next job will probably be the forks. Who knows what delights I'll find in there.

Saturday 18 March 2017

Alloy Repair & More Paint

The generator/flywheel cover had a crack around one of the bolt holes which was likely to let water and grime in so it needed repairing. Unfortunately there aren't any engineering firms local to me so another course of action was needed. I was given the brand name Lumiweld, but after reading up on it I was lead to believe that Durafix was a superior product. The crack was almost complete and would have ruined the usefulness of the case.


The Durafix system is very much in between soldering and brazing. The item needs to be heated and then the stick of alloy needs to be presented to the metal, not the flame. Only once the metal is hot enough will the Durafix rod melt and fill in the area required.


Once the rod has been presented and filled the area required there is likely to be an over fill (forgot to photograph), this will need to be dressed to bring it back to its former glory. It can take a while to get the finish right but it's well worth taking the time to get it perfect so that any finish looks good.


As you can see the repair would be unrecognisable if you didn't know it was there. I used a die grinder with milling bits which did a great job, small files and some 400 sand paper to bring it back to an acceptable finish which looks fine under paint. The filler can be quite hard compared to the surrounding metal (strange as the melting point is much lower) so filing is tough going. I can't comment on how structural it is but I've seen video that shows someone trying to twist and rip two pieces of aluminium apart and it took quite some effort so I'm hoping it keeps the cover together.


I'm very happy with the finish on this cover and apart from a few dust specks to the rear of the cover it's perfect. I'll sort the dust out in a few days when the lacquer has cured fully.

Wednesday 15 March 2017

Tank Prep

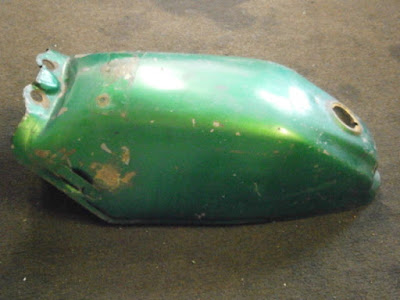
Another job that has been nagging me to be done was the fuel tank. It wasn't the tidiest of tanks and needed a fair bit of TLC.

First I tried sitting it on the frame to make sure it was right. Good job I did, the tank had obviously been on a bike that had been involved in some sort of collision. The rear of the tank where the seat sits on it had been dented and creased, and the underneath of the tank had been pushed down and was now interfering with the frame. This had also caused the sides of the tank to bow out. I was a bit gutted as it wasn't something I was expecting, but I got on with it and started hitting it with a couple of hammers. I had the original tank laying around so I used it as a template to compare size and shape.


After beating the shit out of it for a while I needed to fill the dents I'd made, and there were a few of them to fill. 


 I have put a layer of primer on it just to stop it rusting while I get on with the engine but I'll update on it soon.

Engine Rebuild (the beginning)

Decided to bite the bullet and get on with the main job, THE ENGINE.

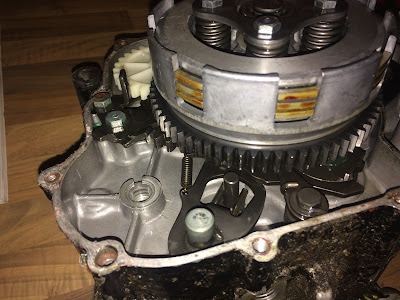
first job was stripping the donor ready to transfer the innards to the original cases. There were a few problems.


Firstly there were a couple of sheered bolts in the cases so they needed extracting.

Secondly, the previous owner of the donor engine had (in their immense wisdom) welded the sprocket to the counter shaft and made quite a meal of it. The problem here is I don't own an angle grinder or a dremmel, so I had to settle for an air powered die grinder but the compressor can't handle than much air so I had to wait every few minutes for the compressor to fill. After 2 hours of patience and grinding the sprocket finally came off.


Third problem was the lack of correct bearings. I had been given a link to a forum where someone had very helpfully listed the bearings needed for the engine but they had listed 2 6203 bearings in stead of the proper 6303 bearings, so 2 new 6303 C3 bearings have been ordered and should hopefully be here tomorrow so I can then close the engine cases and get the clutch back on ready to test the gears before bolting the whole thing together.

Exciting times.


Took both cranks to the local bike shop "Woods Motorcycles" who confirmed the donor crank had play in the big end. Not good, but on the upside that rusty wreck of a crank that came with the bike was spot on so I have cleaned it up and it's fine. The other crank will be sent to be rebuilt and will be saved for a future rebuild.

The donor cases will soon be getting the soda treatment and then I'm going to try and get my money back on eBay.

Friday 10 March 2017

First Paint

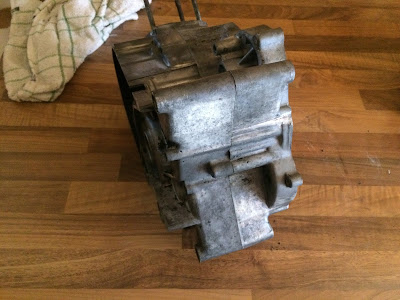
Over the last couple of days I've been getting back into the project after building my new workshop so the first thing to do was finish cleaning the engine cases in the blasting cabinet. I'm quite happy with the results using just Sodium Bicarbonate (and a little bit of elbow grease).


I managed to miss a few spots but got them with a scotch brite pad and sandpaper. 

The new paint is still tacky so the engine build will have to wait for that to dry but should be ready for the day after tomorrow. Here are a few pics of the main cases and right engine cover with fresh paint.


Before blasting.


After blasting


After paint


Now I've never built the internals of an engine/gearbox before so I'm a bit nervous about it but I have a Haynes manual and the local bike shop is just down the road. I'd like to complete it myself though.

Tuesday 7 March 2017

Workshop

With space at a premium I've had to put the bike project on a short hold in order to build a new workshop. It's a 12ft x 8ft shed that was bought new online at the bargain price of £429. So now after a weekend of dismantling a 5ft x 5ft rickety and rotten old shack and putting together my new man cave I will be ready for the next step in the project which will be getting the engine cleaning finished.


Still a little bit of work to do inside to make a workbench then it's full speed ahead on the MT50.